To get things going, I have implemented two Linux infrastructure services in the lab – serial console and PXE service. The serial console service allows me to connect to the serial port of any of the systems in the lab rack. PXE services provides PXE boot capabilities, for now only Fedora installation over network.
Serial Console for Linux Kernel Development
As described in the earlier posts, I have connected to various COM ports of different systems using USB to serial cables, most of these use PL2303 adapter which is well-supported in Linux [Update: PL2303 didn’t work reliably, see the update section below on serial HW]. I am using one of the infrastructure RPis as the terminal server for this along with a USB hub where I can connect the USB end of all the serial cables. This provides all the serial ports at /dev/ttyUSB0, /dev/ttyUSB1… etc. Instead of requiring to log into this terminal server and run something like minicom to connect to the serial port, I am using ser2net as a service to provide connection to the serial consoles from anywhere in my home network, for example from my development workstation. ser2net is a network to serial proxy allowing a client to establish telnet connections to a serial port. I set up ser2net by editing /etc/ser2net.yaml configuration file (not /etc/ser2net.conf as in earlier versions of ser2net).
%YAML 1.1
---
# This is a ser2net configuration file, tailored to be rather
# simple.
#
# Find detailed documentation in ser2net.yaml(5)
# A fully featured configuration file is in
# /usr/share/doc/ser2net/examples/ser2net.yaml.gz
#
# If you find your configuration more useful than this very simple
# one, please submit it as a bugreport

define: &banner \r\nser2net port \p device \d [\B] (Debian GNU/Linux)\r\n\r\n

connection: &con0096
    accepter: tcp,3000
    enable: on
    options:
      banner: *banner
      kickolduser: true
      telnet-brk-on-sync: true
    connector: serialdev,
              /dev/ttyUSB0,
              115200n81,local

connection: &con1096
    accepter: tcp,3001
    enable: on
    options:
      banner: *banner
      kickolduser: true
      telnet-brk-on-sync: true
    connector: serialdev,
              /dev/ttyUSB1,
              115200n81,local
The 115200n81 indicates the baudrate, word length and parity of serial communication link. To connect to the first serial port of the terminal server, I do the following :
[dipankar@conan ~]$ telnet pits1 3000
Trying 192.168.10.101...
Connected to pits1.
Escape character is '^]'.

ser2net port tcp,3000 device serialdev, /dev/ttyUSB0, 115200n81,local [] (Debian GNU/Linux)

�
Password:

Login incorrect
aarch64-pi1 login:
Update on serial console setup [Dec, 2024]
The pl2303 based cables from Amazon [REES52 USB to TTL serial cable] turned out to be unreliable in the long run. After using them for some time, I used get these error messages :
[  889.867709] pl2303 ttyUSB1: pl2303_get_line_request - failed: -32
[  889.870804] pl2303 ttyUSB1: pl2303_get_line_request - failed: -32
[  889.872675] pl2303 ttyUSB1: pl2303_get_line_request - failed: -32
[  889.875285] pl2303 ttyUSB1: error sending break = -32
[  904.942551] pl2303 ttyUSB1: pl2303_get_line_request - failed: -32
[  905.229713] pl2303 ttyUSB1: error sending break = -32
[  915.026993] pl2303 ttyUSB2: error sending break = -110
[  952.579416] pl2303 1-1.3.2:1.0: pl2303_vendor_write - failed to write [0008]: -110
[  952.683426] pl2303 1-1.3.2:1.0: pl2303_vendor_write - failed to write [0009]: -110
[  952.787412] pl2303 ttyUSB1: pl2303_get_line_request - failed: -110
After a while, the console server had to be rebooted. Perhaps the quality of the cable or the version of PL2303 chip was bad. In any case, I have replaced them all by Waveshare (original) USB to TTL serial cable with FT232RNL chip. The FT232 chip seems to be a lot more reliable than the PL2303 I was using in the older cable. For 2U servers with DB9 male connectors, I am using Waveshare (original) USB to DB9 female serial cable. Both of these are considerably expensive than the the older cables, but they are original Waveshare cables and build quality is much better, in my opinion.
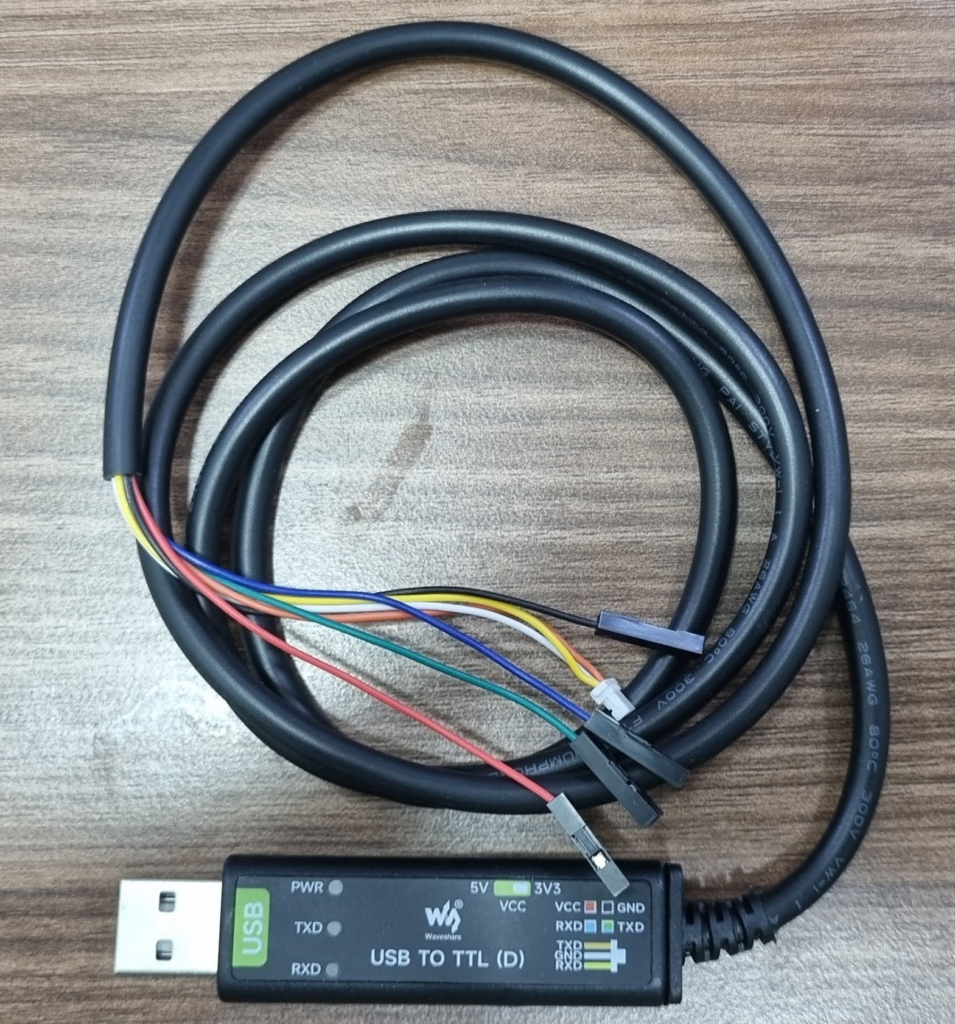
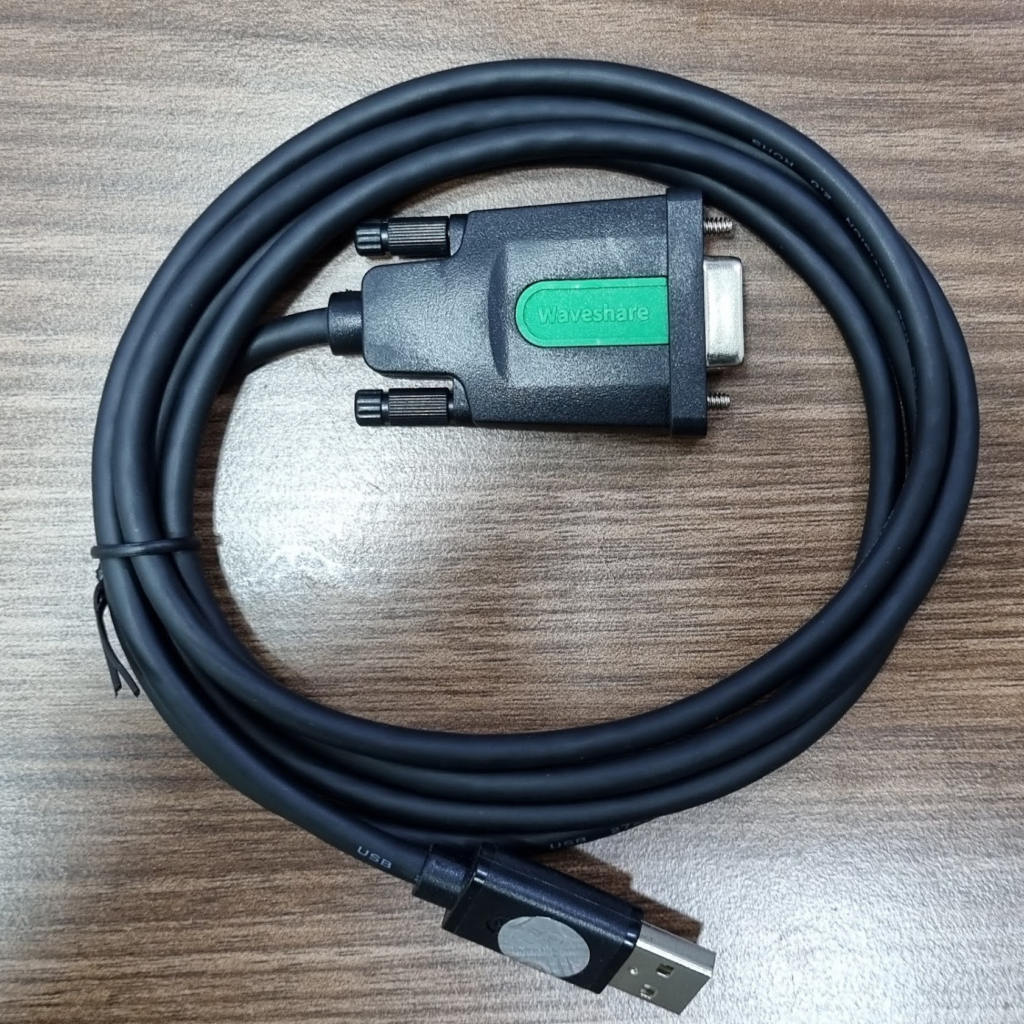
One other issue that crops up with both Debian and Fedora distributions (irrespective of arch) is how agetty is run on the serial port (console). By default, agetty is run to cycle through multiple baud rates if the connection is somehow broken. This is how it is set up in /lib/systemd/system/serial-getty@.service :
# The '-o' option value tells agetty to replace 'login' arguments with an
# option to preserve environment (-p), followed by '--' for safety, and then
# the entered username.
ExecStart=-/sbin/agetty -o '-p -- \\u' --keep-baud 115200,57600,38400,9600 %I $TERM
This causes agetty to set the serial port speed to 57600 baud if the connection is broken somehow at 115200 baud. After this the serial console will stop working as ser2net is configured to use a fixed baud rate of 115200 in this example setup. With the baud rate mismatch, you will see non-printable characters on the serial console like below :
Debian GNU/Linux 11 aarch64-pi2 ttyS0

��<<?<��x`����<�~<�������怘�`0f<<��<���`Øf3��������f?��������f�����̆3������f���03`����<<?<��x`����<�~<������
The solution is to run agetty at only one speed in the target Linux systems – 115200.
[Service]
# The '-o' option value tells agetty to replace 'login' arguments with an
# option to preserve environment (-p), followed by '--' for safety, and then
# the entered username.
ExecStart=-/sbin/agetty -o '-p -- \\u' --keep-baud 115200 %I $TERM
This prevents the random change of serial port speed in the target system.
PXE Service for Linux Installation
I implemented a PXE service in the home lab with the intention that I wouldn’t have to manage installation media and I could repetitively do automated provisioning in future. PXE service works in two parts :
tftp and DNS service using dnsmasq : While PXE boot can transfer files over multiple protocols like http and tftp, for simplicity, I chose tftp. PXE boot also uses DHCP request/response to discover PXE servers in the network. I made the necessary changes in /etc/dnsmasq.conf to set up both of these services for UEFI base x86 servers. This PXE service in my home lab currently provides Fedora only. Eventually, I intend to convert it to a multi-PXE installation server. I added the following lines to /etc/dnsmasq.conf :
port=0
enable-tftp
interface=eth0
# and don't bind to 0.0.0.0
bind-interfaces
# extra logging
log-queries
log-facility=/var/log/dnsmasq.log
# default location of tftp-server on Fedora
tftp-root=/home/dipankar/data/netboot/

#PXE services for different architectures
pxe-service=X86-64_EFI,"Network Boot from pits1 (amd64 UEFI)",uefi/syslinux.efi
pxe-service=22,"Network Boot from pits1 (ARM64 uboot)",rpi/bootcode.bin

# Use DNS proxy mode
dhcp-range=192.168.10.101,proxy
tftp-root sets up the root directory for tftp service. Subsequently, PXE boot files for different vendor class can be set up in different directories under tftp-root and only the relative path needs to be used in dnsmasq.conf. Since tftp service is provided by dnsmasq, I disabled the standard tftp service by removing the tftpd-hpa package.
In my PXE boot setup, I am using pxe-service directive to specify what files to be booted over PXE by the client system. The first parameter to the pxe-service command is the client system architecture. There is a set of pre-defined client architecture (e.g. X86-64_EFI) as per the man page of dnsmasq – x86PC, PC98,
IA64_EFI, Alpha, Arc_x86, Intel_Lean_Client, IA32_EFI, x86-64_EFI, Xscale_EFI, BC_EFI, ARM32_EFI and ARM64_EFI. The actual values for client architectures in real systems use values defined in IANA DHCPv6 standards even though RFC 4578 has a slightly different set of values. The second parameter is a string to display and the third parameter is a file (program) to boot the PXE client system. For my x86_64 UEFI systems, I am using the syslinux package booting instead of the EFI bootloaders (e.g. bootnetx64.efi, shimx64.efi) provided by different distros. This allows me to have a distro agnostic PXE server setup. The boot program in my setup is syslinux.efi which along with a set of other associated programs (ldlinux.e64, vesamenu.c32, libcom2.c32, libutil.c32 – ships with syslinux package) need to be put in a TFTP accessible directory. In my case, the UEFI boot program directory is $tftp-root/uefi. Here is a picture of what my tftp-root directory structure looks like:
dipankar@pits1:~/data/netboot$ tree
.
├── debian
│   └── 12
│       ├── amd64
│       │   └── installer
│       │       ├── initrd.gz
│       │       └── linux
│       └── arm64
├── fedora
│   └── 38
│       └── x86_64
│           ├── initrd.img
│           └── vmlinuz
├── pxelinux.cfg
│   ├── default
│   ├── default-arm-bcm283x
│   └── default.bak
├── rpi
│   ├── bootcode.bin
│   ├── start4.elf
│   └── start.elf
└── uefi
    ├── ldlinux.e64
    ├── libcom32.c32
    ├── libutil.c32
    ├── pxelinux.cfg -> ../pxelinux.cfg
    ├── syslinux.efi
    └── vesamenu.c32
dipankar@pits1:~$ sudo systemctl start dnsmasq
dipankar@pits1:~$ sudo systemctl status dnsmasq
● dnsmasq.service - dnsmasq - A lightweight DHCP and caching DNS server
     Loaded: loaded (/lib/systemd/system/dnsmasq.service; enabled; vendor preset: enabled)
     Active: active (running) since Wed 2023-07-19 13:01:02 IST; 1min 34s ago
    Process: 3186 ExecStartPre=/etc/init.d/dnsmasq checkconfig (code=exited, status=0/SUCCESS)
    Process: 3194 ExecStart=/etc/init.d/dnsmasq systemd-exec (code=exited, status=0/SUCCESS)
    Process: 3203 ExecStartPost=/etc/init.d/dnsmasq systemd-start-resolvconf (code=exited, status=>
   Main PID: 3202 (dnsmasq)
      Tasks: 1 (limit: 779)
        CPU: 168ms
     CGroup: /system.slice/dnsmasq.service
             └─3202 /usr/sbin/dnsmasq -x /run/dnsmasq/dnsmasq.pid -u dnsmasq -r /run/dnsmasq/resol>

Jul 19 13:01:01 pits1 systemd[1]: Starting dnsmasq - A lightweight DHCP and caching DNS server...
Jul 19 13:01:02 pits1 dnsmasq[3202]: started, version 2.85 DNS disabled
Jul 19 13:01:02 pits1 dnsmasq[3202]: compile time options: IPv6 GNU-getopt DBus no-UBus i18n IDN2 >
Jul 19 13:01:02 pits1 dnsmasq-dhcp[3202]: DHCP, proxy on subnet 192.168.10.101
Jul 19 13:01:02 pits1 dnsmasq-dhcp[3202]: DHCP, sockets bound exclusively to interface eth0
Jul 19 13:01:02 pits1 dnsmasq-tftp[3202]: TFTP root is /home/dipankar/data/netboot/
Jul 19 13:01:02 pits1 systemd[1]: Started dnsmasq - A lightweight DHCP and caching DNS server.
syslinux supports interactive menus which can be used to offer choice of different boot options like distributions to the user. The menu can be defined in the file $tftp-root/pxelinux.cfg/default. Here is a snippet of my menu configuration which implements multi-OS / multi-architecture boot (Fedora and debian) and installation:
MENU TITLE  PXE Boot Menu
DEFAULT     vesamenu.c32

    LABEL local
        MENU LABEL Boot from local drive
        LOCALBOOT 0xffff

    MENU BEGIN Fedora
    MENU TITLE Fedora

        MENU BEGIN 38
        MENU TITLE 38

            MENU BEGIN x86_64
            MENU TITLE x86_64

                LABEL installgui
                    MENU LABEL ^Fedora Graphical install
                    KERNEL ::fedora/38/x86_64/vmlinuz
                    APPEND vga=788 initrd=::fedora/38/x86_64/initrd.img inst.repo=https://download.fedoraproject.org/pub/fedora/linux/releases/38/Server/x86_64/os/ ip=dhcp --- quiet

            MENU END

        MENU END

    MENU END

    MENU BEGIN Debian
    MENU TITLE Debian

        MENU BEGIN 12
        MENU TITLE 12

            MENU BEGIN amd64
            MENU TITLE amd64

                LABEL install
                    MENU LABEL ^Install
                    KERNEL ::debian/12/amd64/installer/linux
                    APPEND vga=788 initrd=::debian/12/amd64/installer/initrd.gz --- quiet

            MENU END

        MENU END

    MENU END
In the syslinux menu configuration, :: signifies the full path for tftp-root. This is done because syslinux.efi in my case runs from $tftp-root/uefi directory and hence pxelinux.cfg is a symlink to another location. For the installation kernel and initrd, I used the following:
Fedora
     Copy initrd and kernel from images/pxeboot in the Fedora netinst ISO
     image into the TFTP directory structure described above.
Debian
     Copy initrd and kernel from debian netboot.tar.gz provided for each
     release. They are available under debian-installer directory.
For example, I did this with Fedora :
dipankar@pits1:~/data/netboot$ sudo mount -o loop -t iso9660 ~/images/Fedora-Server-netinst-x86_64-38-1.6.iso ~/data/mnt
mount: /home/dipankar/data/mnt: WARNING: source write-protected, mounted read-only.
dipankar@pits1:~/data/mnt$ cp images/pxeboot/{initrd.img,vmlinuz} ../netboot/fedora/38/x86_64/
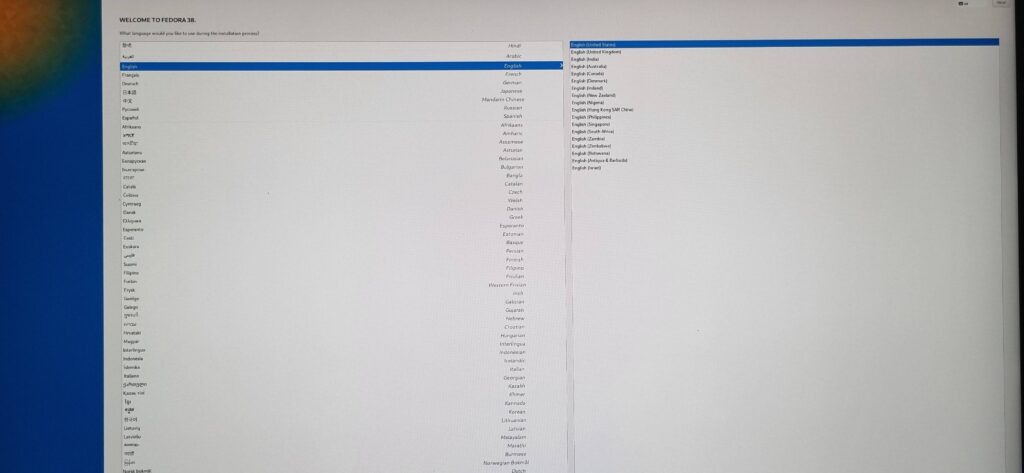
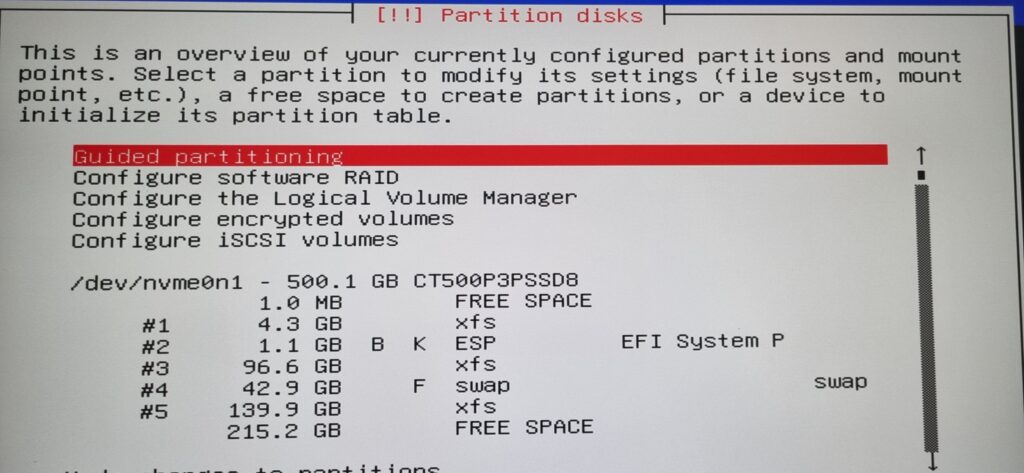
With these in place, here are some of the results in terms of screenshots :
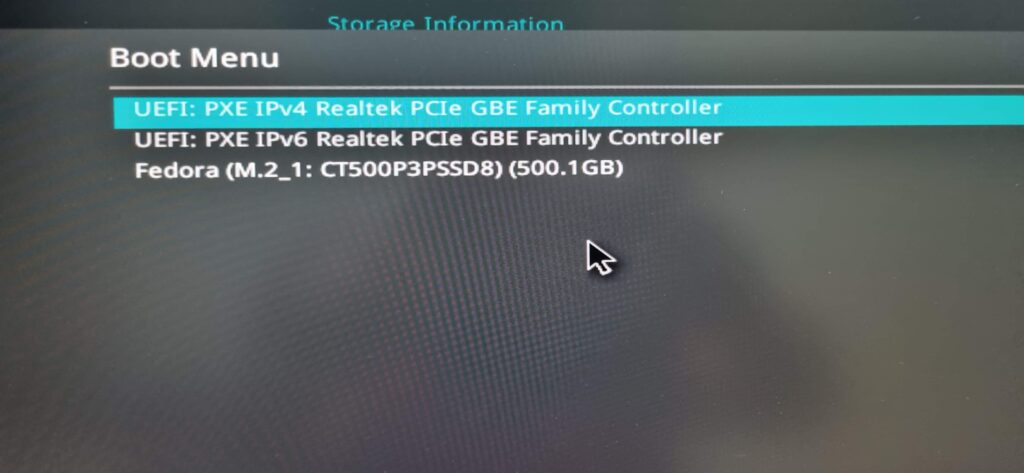
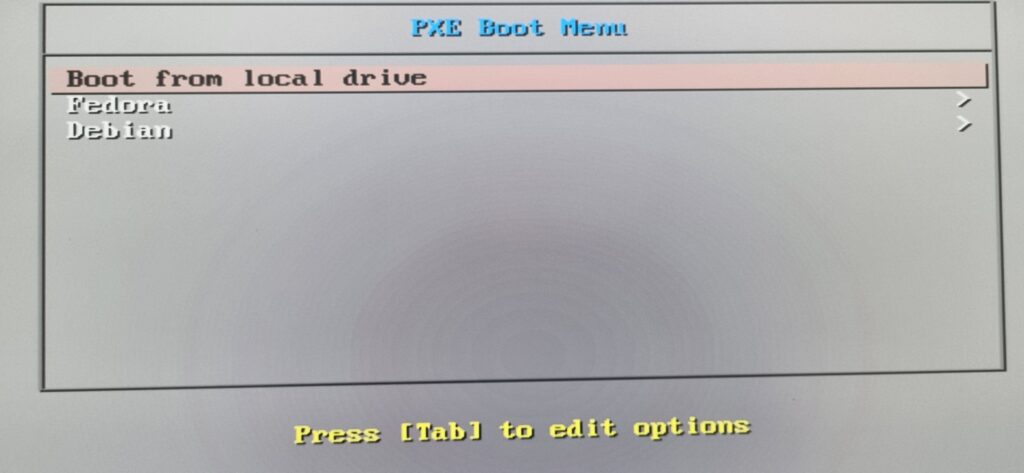
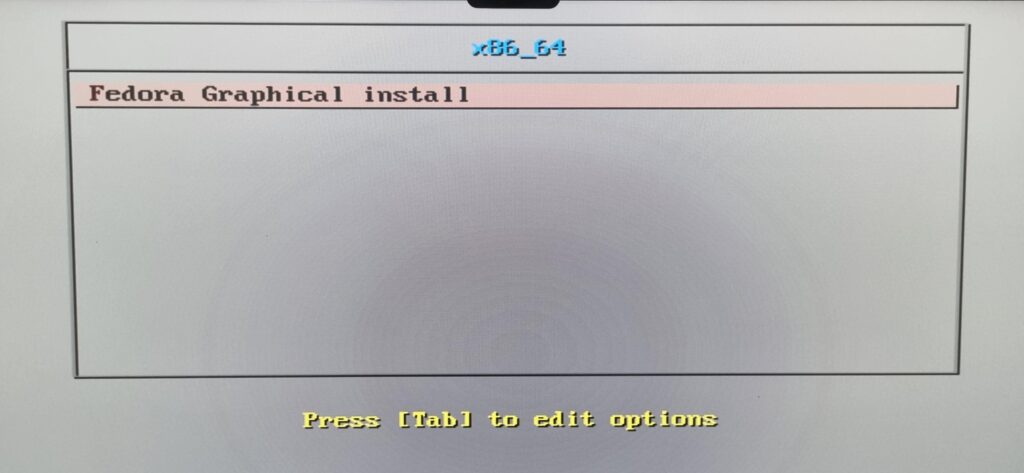
Fedora graphical installation :
Debian installation: (I didn’t get around to make gtk based installation work)
There are a number of useful pages that were very helpful for me.
- https://linuxconfig.org/how-to-configure-a-raspberry-pi-as-a-pxe-boot-server
- https://www.debian.org/distrib/netinst
- https://wiki.syslinux.org/wiki/index.php?title=PXELINUX
- https://docs.fedoraproject.org/en-US/fedora/f36/install-guide/advanced/Network_based_Installations/
They sometimes have conflicting information, but by and large (1) worked for me well.
Note: If there is any reference to arm64 in my setup, it is not complete at the time of writing this post. Only amd64 works with fedora and debian PXE network installation as of now.
